How to Develop Full Stack Spring Boot Application on Google App Engine + Cloud SQL - Step by Step Guide
Web Application =
Spring Boot + Cloud SQL + JPA + Spring Security + Thymeleaf + Bootstrap + Google App Engine
Ver. 1.0.0, 2019-08-11
Table of Contents
Preface
There are couple tutorials available how to develop and deploy Spring Boot application on Google App Engine. This tutorial adds more layers (persistence, security, views) to create useful template which can be used as a starting point for web application.

Scope of this Guide
- Configure and deploy basic version of Spring Boot application to Google App Engine
- Configure Cloud SQL instance
- Configure JPA and create entities
- Use Thymeleaf or JSP templates to create web pages
- Secure application using spring-security
This guide also shows all instructions step by step, to help to understand each part of the application.
This guide can be a foundation for further development of your application - you can fetch code from GitHub (https://github.com/maciej-arkit/Spring-Boot-with-Google-App-Engine), and extend it.
This guide does not aim to be a comprehensive guide on web application development - its goal is to address the most important subjects related to Spring-Boot and Google App Engine development.
Why Google App Engine?
Google App Engine is a Platform as a Service, which allows to build scalable applications.
It is part of Google Cloud Platform, and it is only one of the options you can use to build applications on top of Google Cloud Platform.
Google App Engine is quite cost effective - it actually allows to run small applications for free, as long as they stay below certain traffic threshold, which should be enough for small applications.
Hence it can be a good alternative for everyone who is looking for scalable platform for prototyping and building multiple startup applications without a need to pay a lot.
Please remember that this guide uses also Cloud SQL. Cloud SQL do not provide free quotas, hence running application using Cloud SQL will always result in charges.
This guide uses cheapest db-f1-micro instance, which should cost ~$0.0105 per hour (see https://cloud.google.com/sql/pricing#2nd-gen-pricing for exact pricing).
Google App Engine has many benefits, but it has also some limitations.
It may not always be the most convenient for development due to its nature - i.e. as Platform as a Service, it introduces native mechanisms and limitations (ex. threads management) which may require additional effort to adjust your application, but thankfully it is quite rare.
Google provides Dev Server, which replicates GAE environment on localhost. As much as it is very helpful in majority of cases, it does not always reflects behavior of a real GAE environment 1:1.
Migrating to other providers
It is relatively easy to migrate from GAE to other environment - ex. to standard virtual machine provided by Amazon, Google or MS. Of course, the effort may be bigger if your application will start to use many services specific for GAE only - ex. tasks, queues, etc.
Prerequisites
To complete this guide, following applications are required:
- Java SDK 1.8
- Maven 3.5+
- Google Cloud CLI (“gcloud”)
- Access to terminal - preferred Linux or MacOS.
- Installed mysql client - required if you would like to connect directly from your machine to Google Cloud MySQL.
Google Cloud - Prices
You should be able to create and run sample application without setting up billing for your GCP account, especially if you just created new one.
Sometimes it may be required. It depends on free quotas and free tokens your account may have received from Google. Total cost of running this guide should rather not exceed 1$. If you decide to configure billing for your account, please ensure to configure billing limits so you can control expenses. Please remember to remove resources created on GCP if you do not plan to use them after finishing this guide, to avoid unnecessary charges. For more information please refer to https://cloud.google.com/products/calculator
GitHub Sources
Sources for each exercise are available in GitHub https://github.com/maciej-arkit/Spring-Boot-with-Google-App-Engine
For each step there is related branch containing full working solution:
You can create whole project step by step, from scratch, or you can fetch sources from github and navigate between branches to follow code changes.
Step 1. Initial version of Spring Boot application
In this section, we will configure Google App Engine account, create initial version of Spring Boot application and deploy it to Google App Engine.
NOTE: All steps executed in this chapter using gcloud CLI, can be also done manually using Google Cloud Console (https://console.cloud.google.com)
1/ Use Spring Initializr to create initial version of Spring Boot application
Send request to Spring Initializr from command line to download initial version of project:
Alternatively, you can go directly to https://start.spring.io/, fill out all required fields (including “Packaging: War”
“Java: 8”) and select Spring Web Starter and GCP Support as dependencies. and click “Generate the project”
2/ Initialize Google Cloud project
From command line invoke:
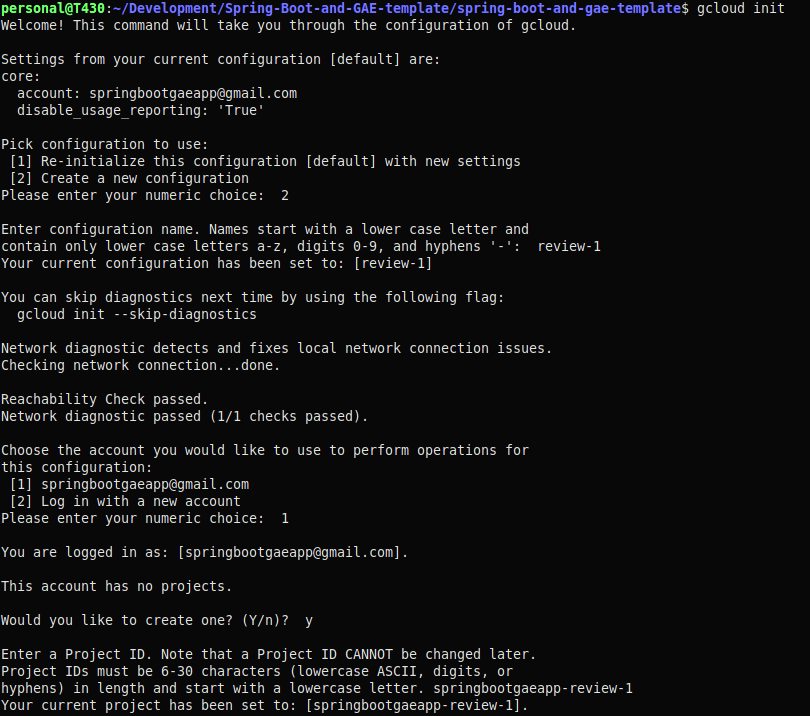
This command will start project initialization and will take you through the setup project.
Please follow the instructions on the screen.
You will be asked couple questions:
- You need to login to your Google account
- If you have any existing configurations you will be asked to pick one or create configuration from scratch.
For this guide, please create new configuration. - Select which Google Account do you want to use
- Create new project and provide name for it
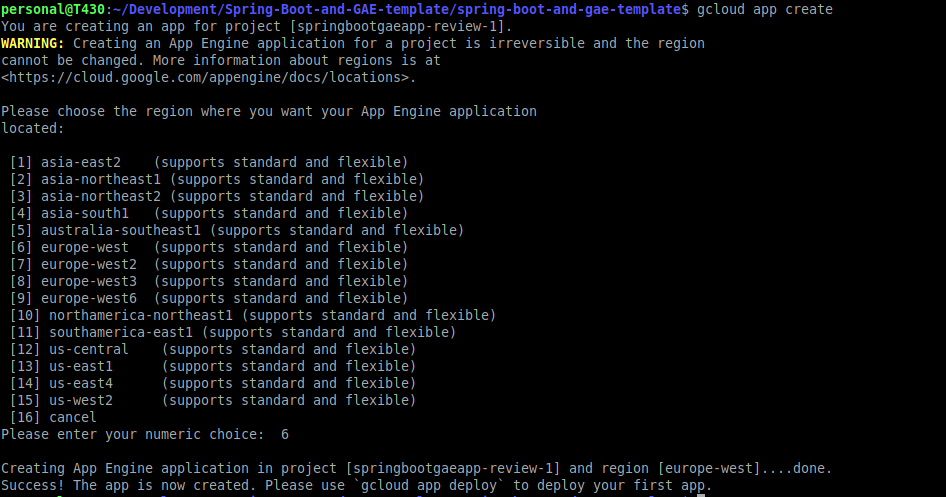
3/ Create Google App Engine application
Invoke following command to create Google App Engine application
4/ Update application code
Update pom.xml - add appengine-maven-plugin:
Add src/main/webapp/WEB-INF/appengine-web.xml with following content
Create new class named ShopController to render simple “Hello World!” text:
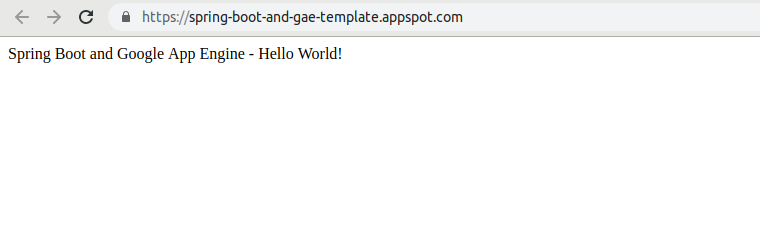
7/ Verify that application is working
Run appengine on localhost:
If application works properly on localhost, you can now deploy application to Google App Engine (replace <PROJECT_NAME> with name of the project created with gcloud init, replace version with any number - for this step “1” is a good choice):
Go to Google Cloud Platform - App Engine dashboard (https://console.cloud.google.com/appengine) and verify that your application is deployed and is serving the traffic at https://<PROJECT_ID>.appspot.com/
FINAL NOTE: If you experience any problems, you can fetch working code from https://github.com/maciej-arkit/Spring-Boot-with-Google-App-Engine and switch to branch 1-spring-boot-initial
Step 2. Spring Boot + Cloud SQL (MySQL)
Prerequisites:
- Ensure that Cloud SQL API and Cloud SQL Admin API for your project are enabled:
- Go to https://console.developers.google.com/apis/api/sqladmin.googleapis.com/overview, ensure that your project is selected in a drop down in navigation bar, and click “Enable” button
- Go to https://console.developers.google.com/apis/library/sql-component.googleapis.com and also ensure that API is enabled.
1/ Create Cloud SQL instance
🕒 This process may take few minutes
Please note that for the purpose of this guide we use db-f1-micro instance, which is the cheapest option.
For more details on pricing, please see: https://cloud.google.com/sql/pricing
By default gcloud creates MySQL instance. If you would like to create different, you can provide “--database-version” parameter.

2/ Create database
Invoke command to create database:

Set password for default “root” user:
3/ Update application configuration
In this step we will need to update application configuration so it can connect to Cloud SQL database.
3.1/ Add spring-cloud-gcp-starter-sql-mysql dependency to pom.xml:
3.2/ Update application.properties:
To get value for “spring.cloud.gcp.sql.instance-connection-name” property in application.properties, please invoke following command:
4/ Update ShopsController - add endpoint to test JDBC connectivity
Add jdbcTemplate and “/test” endpoint to ShopsController
5/ Run and test application
Before running application, we need to create service account keys, so local application can access Cloud SQL database.
To create and download keys as a JSON file, please invoke following command:
NOTE: As [IAM_SERVICE_ACCOUNT] you can use predefined default service account which is usually [PROJECT_ID]@appspot.gserviceaccount.com. You can check available service accounts in Google Console: https://console.cloud.google.com/projectselector2/iam-admin/serviceaccounts?supportedpurview=project&project&folder&organizationId
When key.json is downloaded, please set GOOGLE_APPLICATION_CREDENTIALS environmental variable to point to this file. This variable is required only on localhost:
Alternatively, you can set a property in application.properties file spring.cloud.gcp.credentials.location, but this property needs to be disabled when deploying to Google Cloud - otherwise application will throw exception (File not found).
Now you can try to run application on localhost:
If everything works correctly, and application can connect to Cloud SQL, you should see timestamp value fetched from database:

6/ Deploy application to Google App Engine
Now if everything works on localhost, application can be deployed to Google App Engine.
Please invoke following command to deploy application to GAE:
When application is deployed it can be tested at https://[project_id].appspot.com
Additional steps
Try to connect to Cloud SQL database from command line using gcloud- this requires pre installed mysql client on your machine:
FINAL NOTE: If you experience any problems, you can fetch working code from https://github.com/maciej-arkit/Spring-Boot-with-Google-App-Engine and switch to branch 2-spring-boot+cloud-sql-mysql
References
Step 3. Spring Boot + JPA
In this step we will add support for JPA.
JPA adds abstraction layer on top of JDBC and creates a link between relational database and Java objects.
1/ Add dependency to pom.xml
2/ Create “Shop” entity
3/ Create “ShopRepository”
4/ Update application.properties / create import.sql
Application needs information about SQL dialect to allow JPA to works properly.
We also would like to recreate database upon application startup and display SQL statements in the logs.
Please add following lines at the end of application.properties:
Please add src/main/resources/import.sql file with following content:
This script will be executed during application startup to create test records.
5/ Update “ShopsController” to use JPA interface
Please update ShopsController as follows. Please notice that at this point we will not use JdbcTemplate anymore.
6/ Build and test application
Now we should build and test our application on localhost and then deploy it to GAE
Run application locally and verify that endpoint http://localhost:8080/shops works properly. It should display list of shops:

References
Step 4. Add web pages (with Thymeleaf)
NOTE: In this part of the guide, we will create layout and web pages using Thymeleaf template engine.
If you do not know Thymeleaf, at this point, Thymeleaf just as a templating engine used for purpose of this guide - it is not the main subject or critical part. You don’t have to worry too much if you do not know it in and out.
1/ Add Thymeleaf and Bootstrap dependencies.
- spring-boot-starter-thymeleaf will be used to render dynamic pages
- thymeleaf-layout-dialect will be used to create simple pages layout (header, content, footer)
- bootstrap will help to create nice looking pages
2/ Update “ShopsController” to regular controller
Let’s convert ShopsController to a regular controller (change “@RestController” to “@Controller”).
Now our endpoint methods need to return String - name of a corresponding Thymeleaf template.
3/ Add Thymeleaf templates
Now let’s add Thymeleaf templates, and define simple page layout consisting of header and footer:
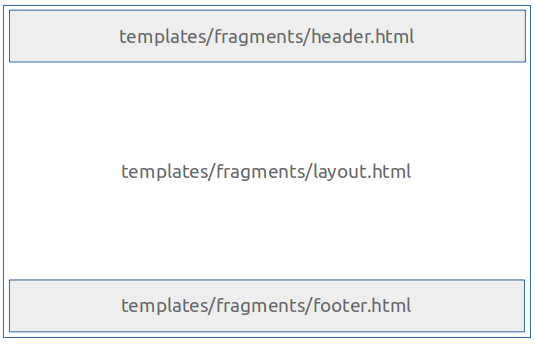
We need to add following files:
Please find sources for each template below:
6/ Build and test application
As usually, now we should build and test application on localhost and then deploy it to GAE
Run application locally and verify if everything works properly.

FINAL NOTE: If you experience any problems, you can fetch working code from https://github.com/maciej-arkit/Spring-Boot-with-Google-App-Engine and switch to branch 4-spring-boot+cloud-sql-mysql+JPA+Thymeleaf+Layout
Step 5. Secure application (with Spring-Security)
In this step application will be secured using Spring Security. Adding dependency to “spring-boot-starter-security” by default secures all application endpoints. We will also update view templates and application.properties to add simple configuration for user/password. Complete integration so application can use MySQL to store users and passwords will be configured in Step 6. Configure Spring Security to work with JPA on top of MySQL database.
1/ Add spring-boot-starter-security dependency
2/ Add statically configured user and password
Add following lines at the end of application.properties:
3/ Update appengine-web.xml (enable sessions for Google App Engine)
Spring Security requires session to keep authentication data.
4/ Update “Logout” button in header.html template
Now as we have configured basic security, we can update “Logout” button to point to “/logout” endpoint, which is by default exposed by Spring Security. Go to “resources/templates/fragments/header.html” and update “Logout” button as follows:
5/ Add error page
By default Thymeleaf redirects all errors to error template (/src/main/resources/templates/error.html).
Now let’s add error.html
6/ Build and test application
As usually, now we should build and test application on localhost and then deploy it to GAE
Run application locally and verify if everything works properly.
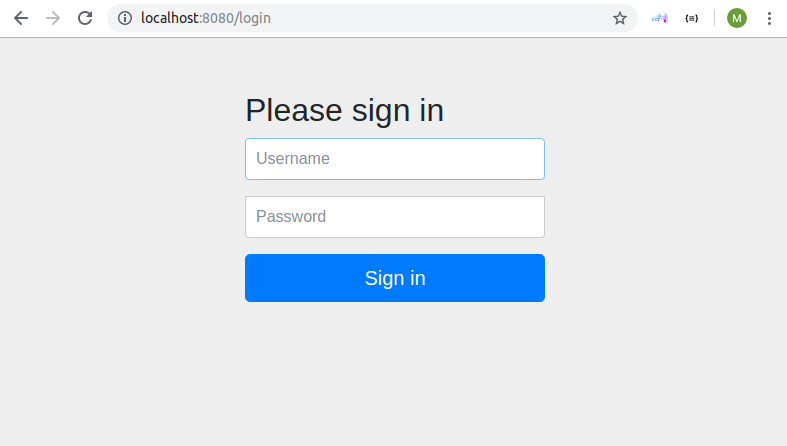
Now you need to login to access application.
FINAL NOTE: If you experience any problems, you can fetch working code from https://github.com/maciej-arkit/Spring-Boot-with-Google-App-Engine and switch to branch 5-spring-boot+cloud-sql-mysql+JPA+Thymeleaf+spring-security
Step 6. Configure Spring Security to work with JPA on top of MySQL database
In this step we will extend spring security to store users in Cloud SQL database.
Before we create new classes, let’s add Lombok dependency to pom.xml, to keep our classes compact and readable. Lombok automatically generates getters and setters, so you do not need to write additional code.
If you prefer to keep code in a classic fashion, that is okay too - you can skip adding Lombok and add standard getters and setters.
1/ Create Spring Security model classes

We need to create User and Role entities to keep information about users and their roles.
Each user can have 0...N roles.
User and Role entities will be used to provide information to Spring Security framework for purpose of authentication and authorization.
2/ Create repositories
Once we have defined entities (User and Role), we need to define corresponding repositories:
3/ Create CustomUserDetailsService
Now we need to implement our CustomUserDetailsService which loads user information from database.
It also fetches information about roles assigned to user.
4/ Create WebSecurityConfig
We need to extend WebSecurityConfigurerAdapter to setup simple authorization rules.
Only admin users will be allowed to access “/admin/**” urls. Regular users and admins can access all other urls in the system.
5/ Prepare SQL script to create initial users
Add following script at the end of “import.sql” to create “user” and “admin” users. Both users will have password “password”.
Please also notice that we assign ROLE_USER to “user” and ROLE_ADMIN to “admin”.
6/ Add “AdminController” and simple “Admin” dashboard
At the end, let’s add AdminController and simple Admin dashboard.
This part of the system will be available only for users having ROLE_ADMIN (please see com/example/demo/security/WebSecurityConfig.java).
7/ Build and test application
As usually, now we should build and test application on localhost and then deploy it to GAE
Run application locally and verify if everything works properly.
Test 1: Login as “user” (password: “password”).
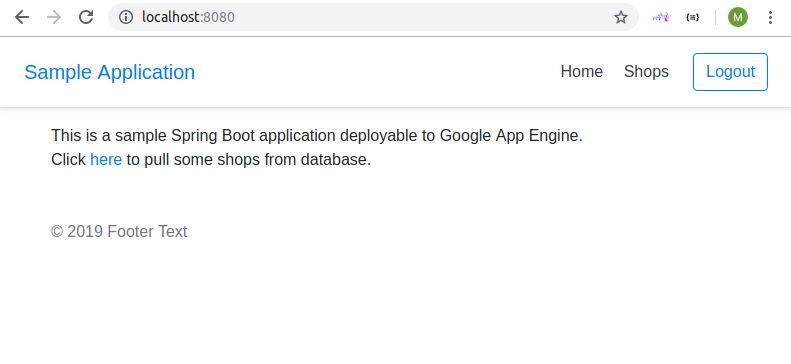
Verify that you can access home page and list of shops.
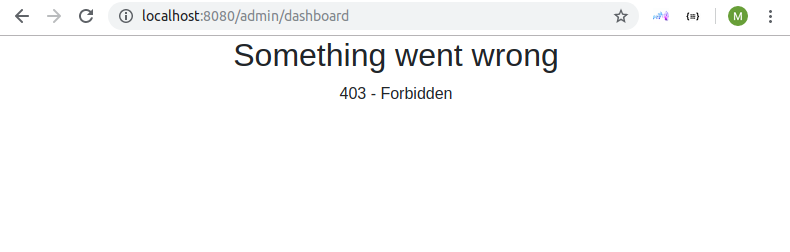
Verify that you cannot access /admin/dashboard - you should see HTTP 403 message (shown below).
Test 2: Login as “admin” (password: “password”)
Verify that you can access all pages which are allowed for regular user (“/”, “/shops”).
Verify that you can access “/admin/dashboard” - you should see dashboard page as shown below.

FINAL NOTE: If you experience any problems, you can fetch working code from https://github.com/maciej-arkit/Spring-Boot-with-Google-App-Engine and switch to branch 6-spring-boot+cloud-sql-mysql+JPA+Thymeleaf+spring-security-update
References
- Spring Security using Spring Data JPA + MySQL + Spring Boot: https://www.youtube.com/watch?v=IyzC1kkHZ-I
- Spring Boot + Spring Security + Thymeleaf Form Login Example: https://memorynotfound.com/spring-boot-spring-security-thymeleaf-form-login-example/
Resources clean up
During the training we have created couple resources on Google Cloud Platform.
It is worth to ensure that these resources are removed or disabled after the training. Otherwise your account can be charged.
Troubleshooting
Problem: Application cannot connect to Cloud SQL from localhost
Possible solution: Ensure that GOOGLE_APPLICATION_CREDENTIALS variable is configured (it should refer to credentials json file)
References
- Spring JDBC for GCP: https://cloud.spring.io/spring-cloud-gcp/multi/multi__spring_jdbc.html
- Spring Cloud GCP MySQL Sample: https://github.com/spring-cloud/spring-cloud-gcp/tree/master/spring-cloud-gcp-samples/spring-cloud-gcp-sql-mysql-sample
- Spring Cloud GCP PostgreSQL Sample: https://github.com/spring-cloud/spring-cloud-gcp/tree/master/spring-cloud-gcp-samples/spring-cloud-gcp-sql-postgres-sample
- Spring Data JPA with Spring Cloud GCP SQL Sample: https://github.com/spring-cloud/spring-cloud-gcp/tree/master/spring-cloud-gcp-samples/spring-cloud-gcp-data-jpa-sample
- Spring Pet Clinic using Cloud SQL: https://codelabs.developers.google.com/codelabs/cloud-spring-petclinic-cloudsql/index.html#0
- Cloud Spring and Google App Engine Datastore: https://codelabs.developers.google.com/codelabs/cloud-spring-datastore/index.html
- SpringBoot HelloWorld for App Engine Standard (Java 8): https://github.com/GoogleCloudPlatform/getting-started-java/tree/master/appengine-standard-java8/springboot-appengine-standard
- Deploy Spring Boot Application in App Engine standard: https://codelabs.developers.google.com/codelabs/cloud-app-engine-springboot/
- Spring Boot Tutorial - Bootstrap a Simple Application: https://www.baeldung.com/spring-boot-start
- Issues Dashboard (from Spring Boot, from Zero to Hero): https://github.com/bclozel/issues-dashboard
- Database initialization in Spring Boot: https://www.javaskool.com/database-initialization-in-spring-boot/


Komentarze
Prześlij komentarz